
Welcome to Lead Finder
Find businesses, turn them into leads, and follow each one through calls, WhatsApp, email and meetings, all in one place. This guide walks through every screen, one module at a time.
Getting started
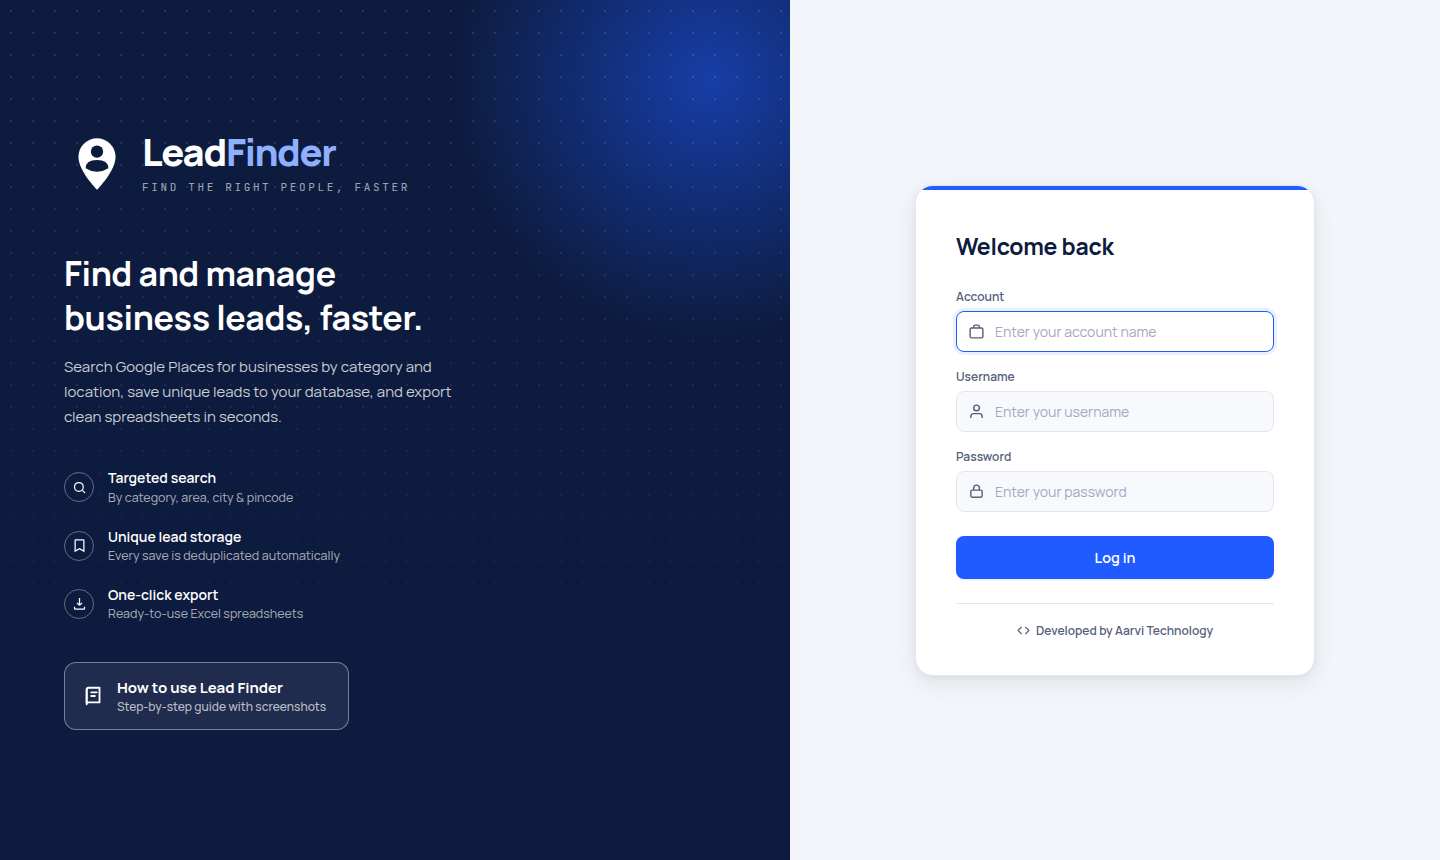
Everything begins at the log-in page. Your login details were emailed to you when your account was created.
Logging in
- Open the Lead Finder web address from your welcome email.
- Type your Account name. This is your company's account, the same for everyone in your team.
- Type your Username and Password.
- Click Log in.
Finding your way around
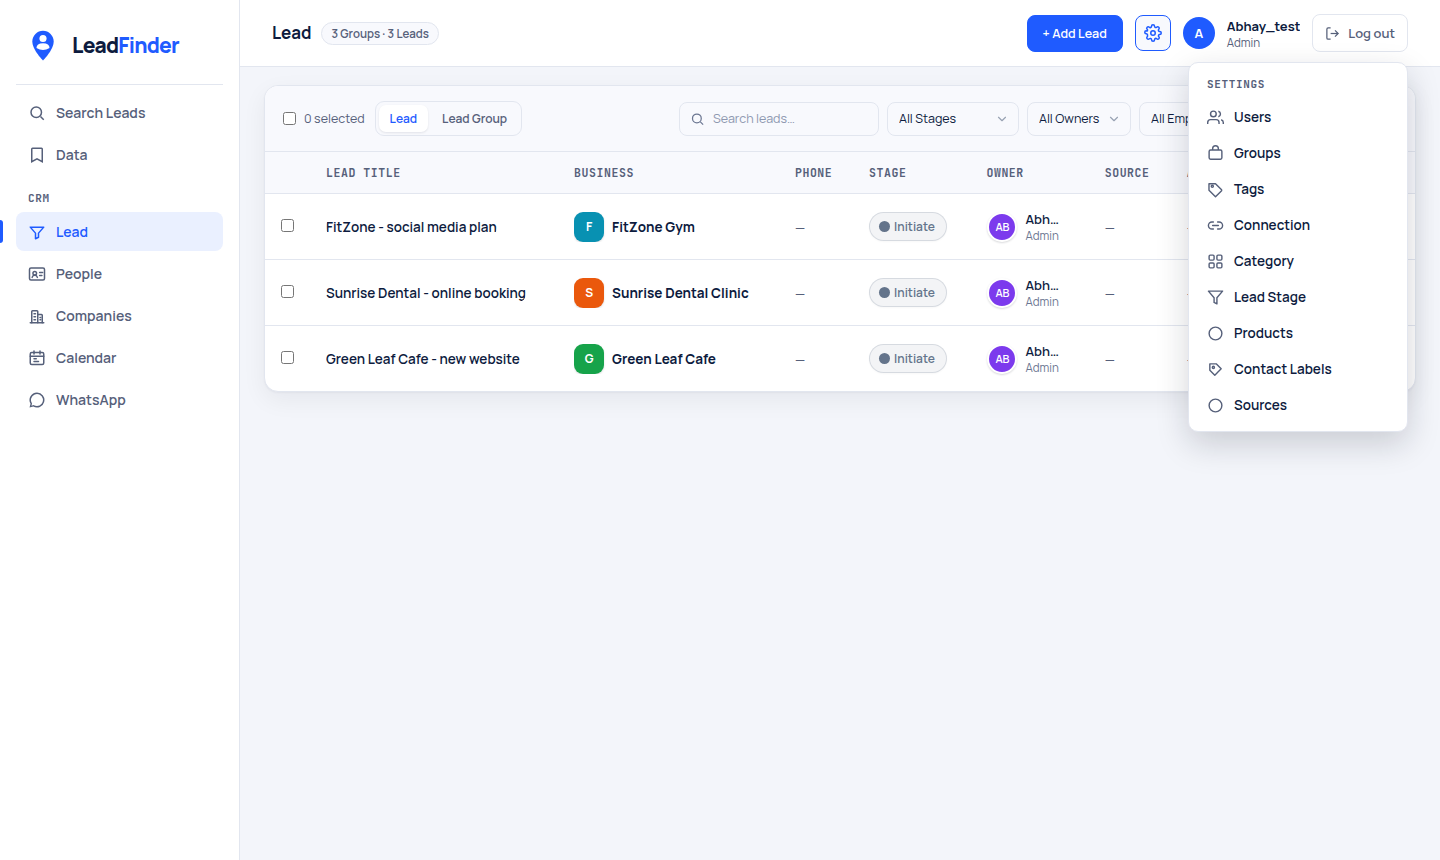
- Left menu: every module you can use: Search Leads, Data, then the CRM group (Lead, People, Companies, Calendar, WhatsApp).
- Gear icon (top right): opens Settings: Users, Groups, Tags, Connection, Category, Lead Stage, Products, Contact Labels and Sources.
- Your name and Log out: top right corner.
Search Leads
Find businesses on Google by the kind of business and the place. Every result is saved to your Data automatically, and the same business is never saved twice.
How to search
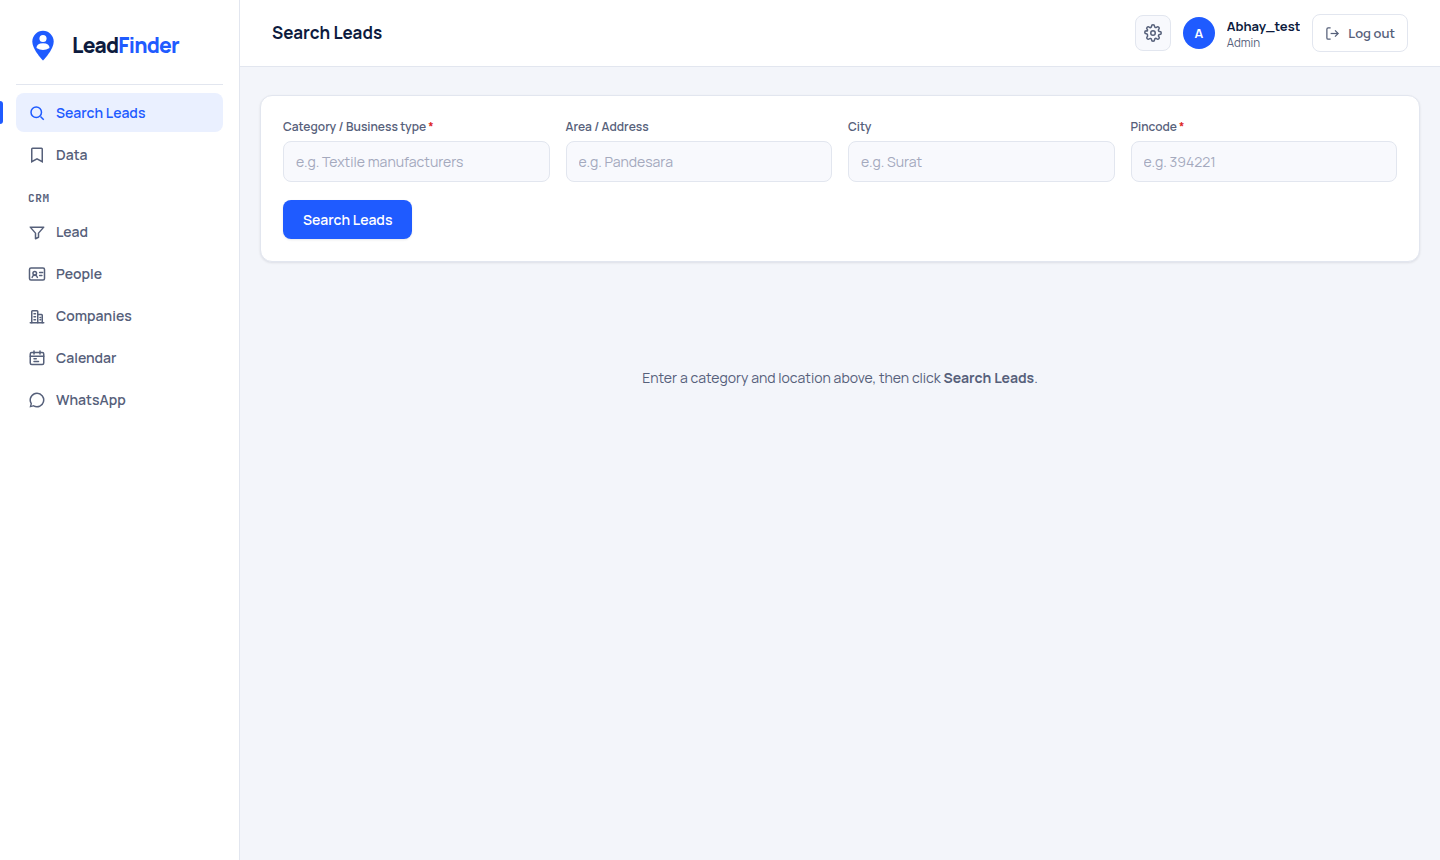
- Open Search Leads from the left menu.
- Fill in Category / Business type, for example Textile manufacturers. This one is required.
- Optionally add an Area / Address and a City to narrow the search.
- Enter the Pincode (required).
- Click Search Leads. The matching businesses appear below, with their contact details.
- Click Export to Excel to download the results as a spreadsheet.
Data
Your library of stored businesses. It holds everything your searches found, plus anything you add by hand.
What you can do here
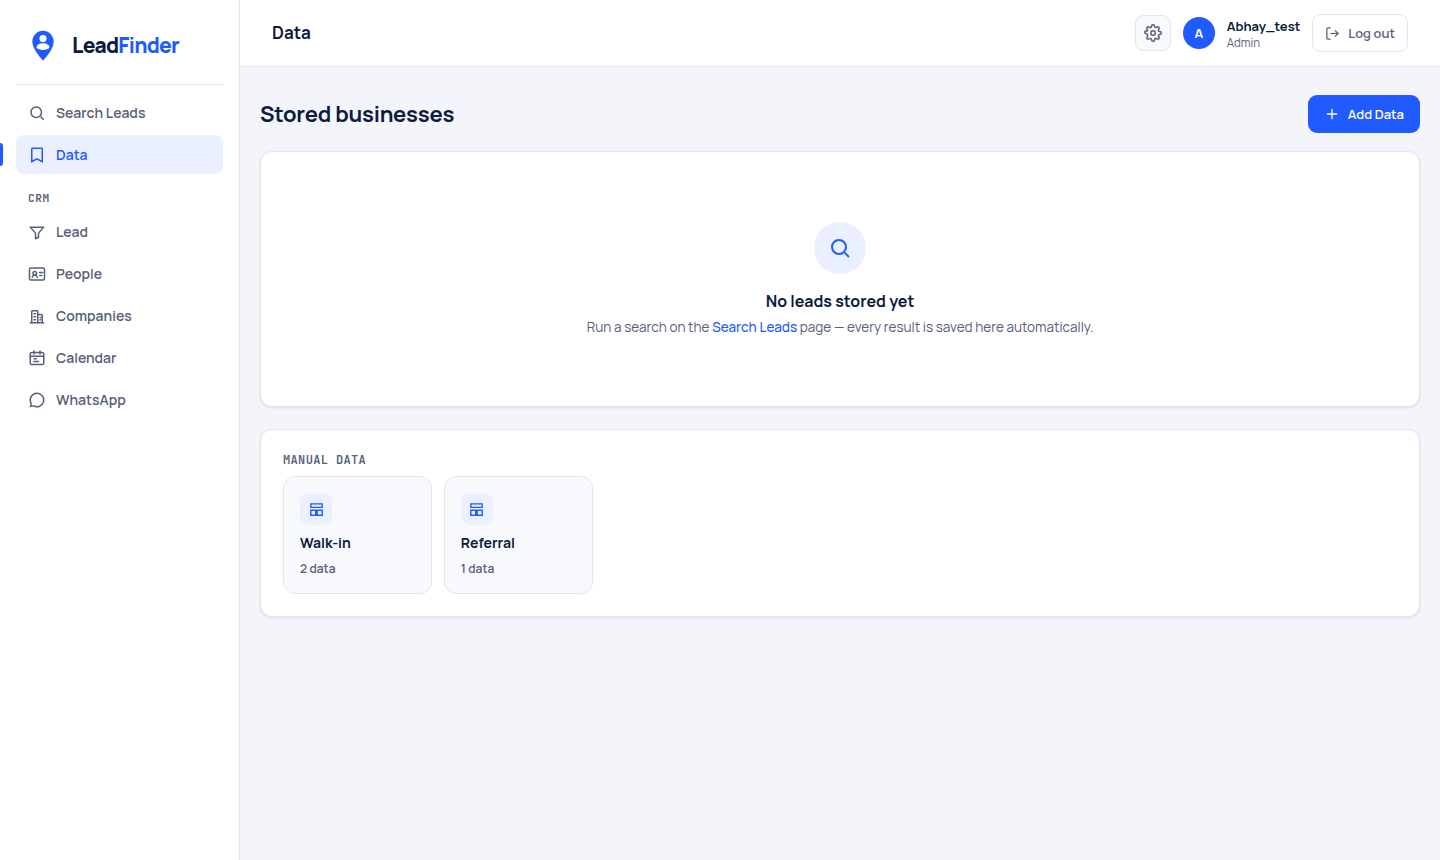
- Browse stored businesses: everything saved from Search Leads. Filter by state, city or category and search by name.
- Export to Excel: download what you are looking at as a spreadsheet.
- Manual Data: businesses you added yourself, grouped into cards by Source (for example Walk-in or Referral). Click a card to open that group.
- Remove an entry you no longer need. You will be asked to confirm first.
Adding a business by hand
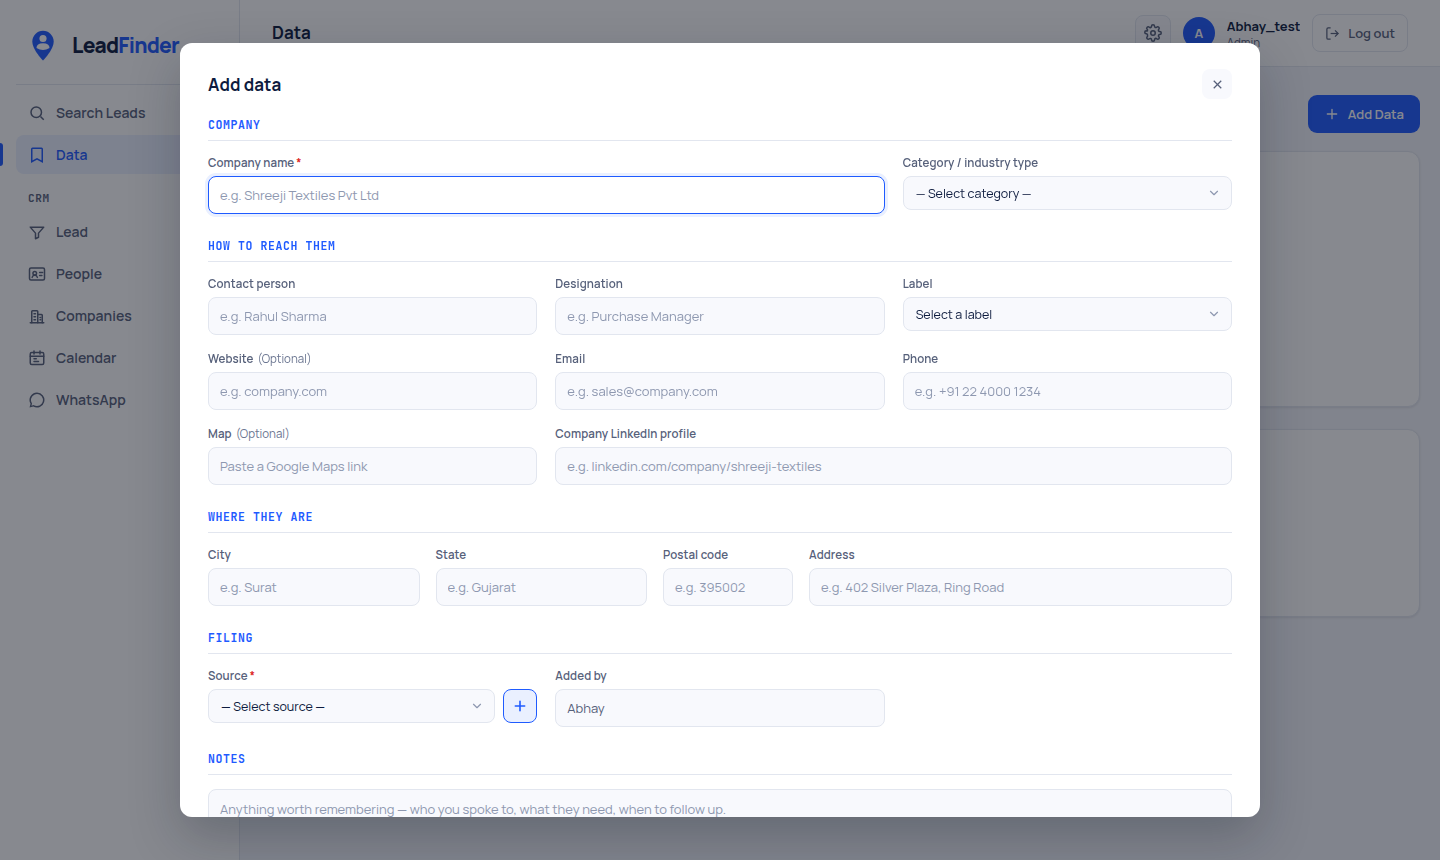
- Click Add Data (top right).
- Enter the Company name and choose a Source. Both are required.
- Fill in whatever else you know: contact person, phone, email, website, address, notes.
- Save. The business appears under its Source card.
Lead
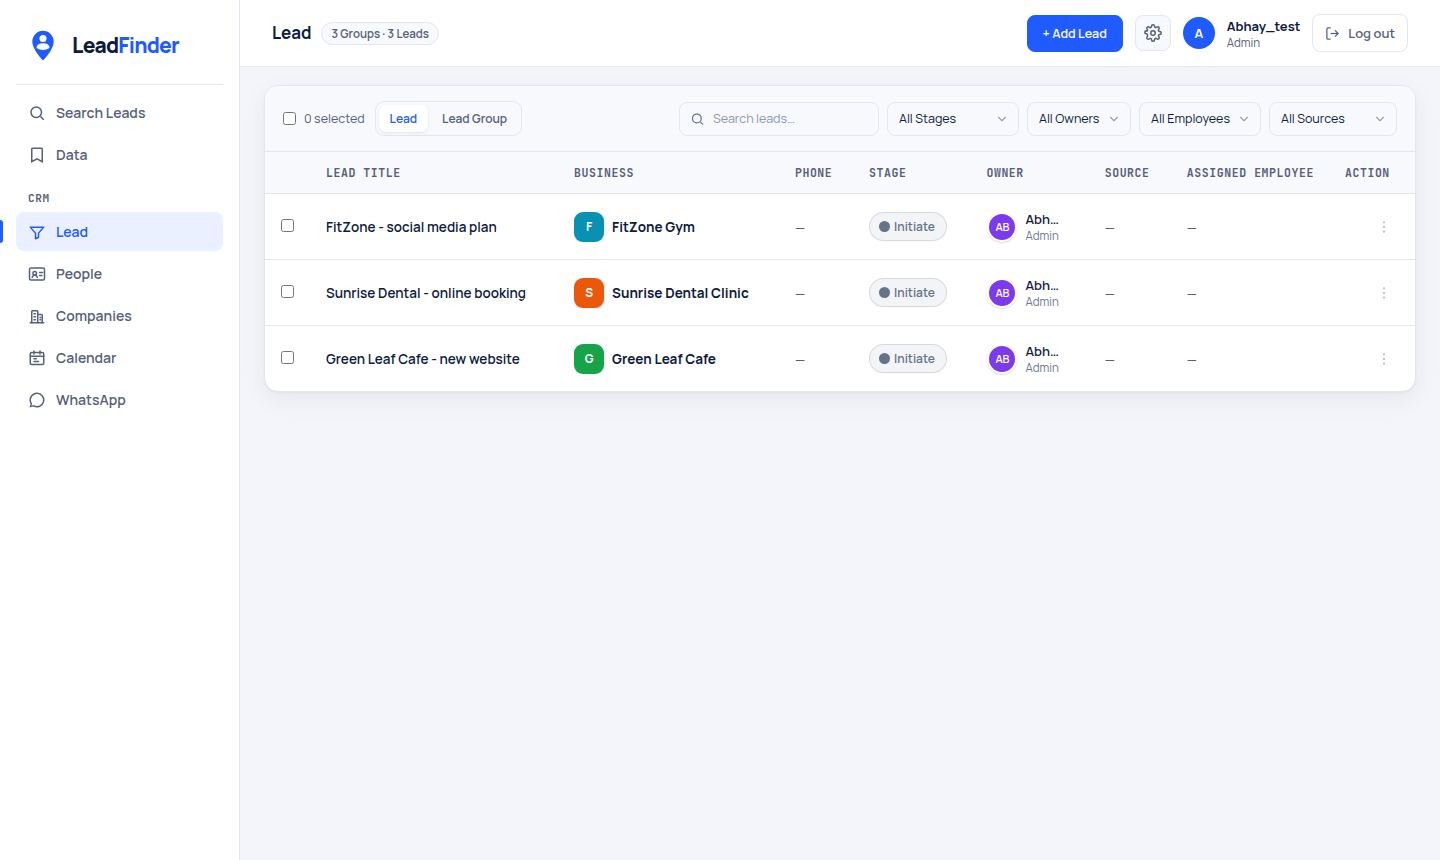
A lead is a sales opportunity you are working. Each lead has a stage, an owner, a value and a full history of everything done with it.
Reading the list
| Column | What it shows |
|---|---|
| Lead title | The name of the opportunity. Click it to open the lead. |
| Business | The company the lead belongs to. |
| Stage | Where the lead is in your sales process, such as Initiate or Negotiation. |
| Owner | The person responsible for the lead. |
| Source | How the lead came to you. |
| Assigned employee | Colleagues helping on the lead. |
- Search and filters: search by title, or filter by Stage, Owner, Employee and Source.
- Lead / Lead Group: the switch at the top left changes between one row per lead and leads grouped by business.
- Select several: tick the boxes to act on many leads at once, for example to remove them.
- ⋮ menu: actions for a single lead.
Adding a lead
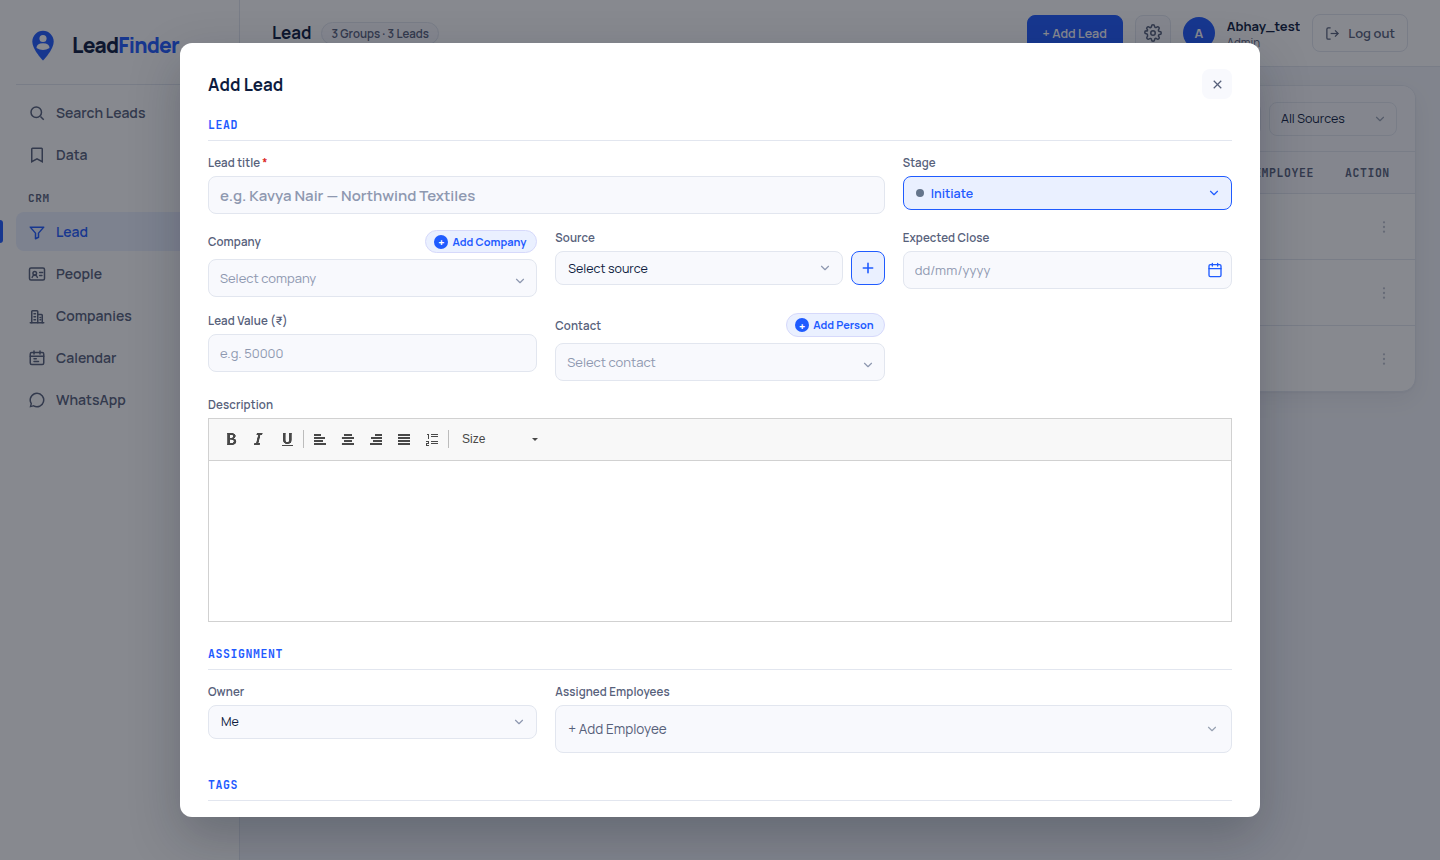
- Click + Add Lead.
- Enter the Lead title, for example Kavya Nair, Northwind Textiles. It is the only required field.
- Pick a Stage, the Company and Contact. Use Add Company or Add Person if they don't exist yet.
- Set the Source, Lead Value and Expected Close date.
- Choose the Owner and any Assigned Employees, add Tags, then save.
Working a lead
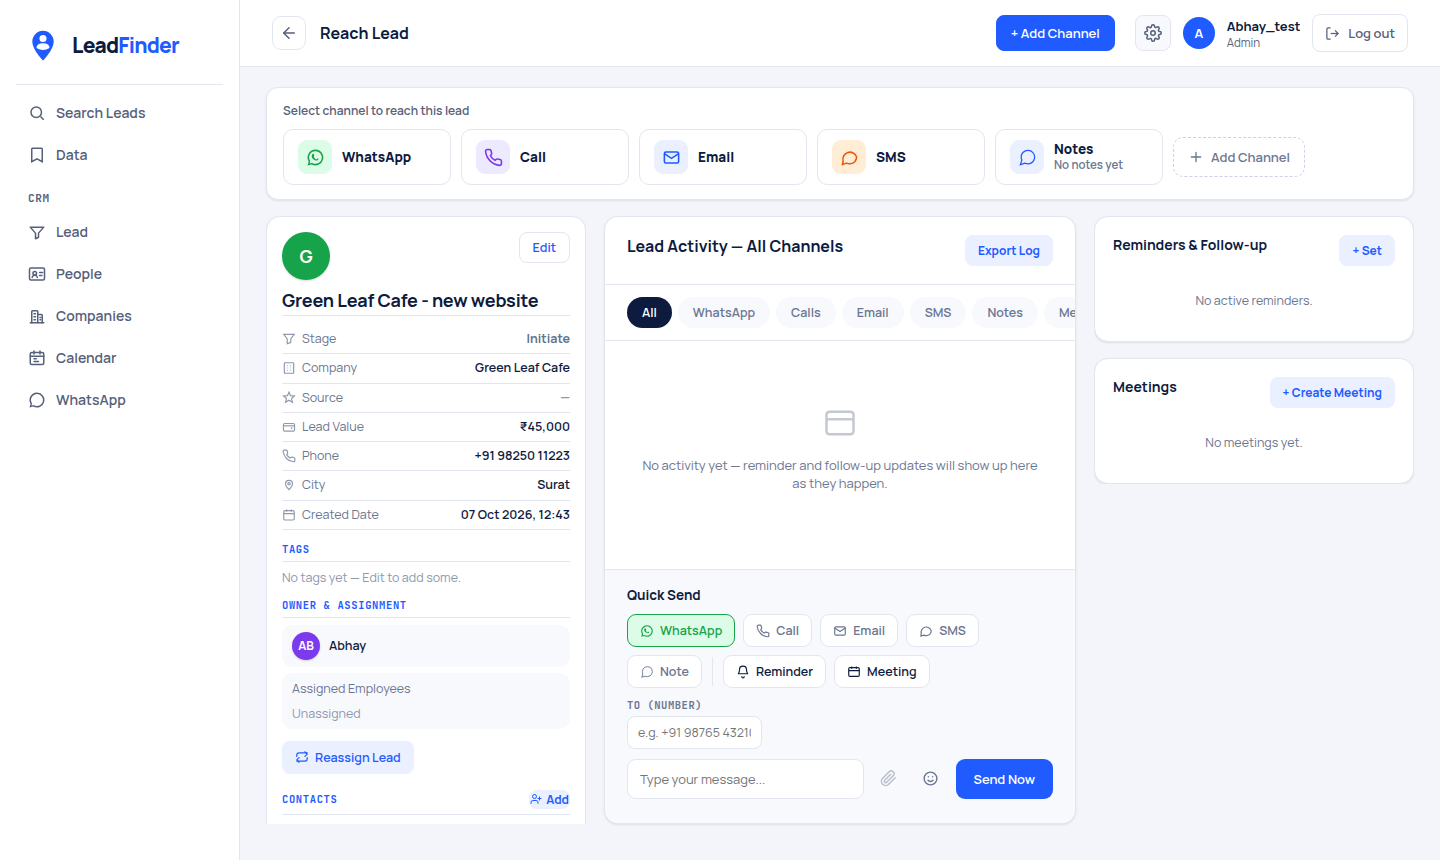
Click any lead title to open its page. This is where you contact the lead and keep a record of everything that happens.
The three areas
| Area | What it does |
|---|---|
| Left: lead details | Stage, company, source, value, phone, city and created date. Edit changes them. Below are the lead's Tags, its Owner & Assignment (with Reassign Lead) and its Contacts. |
| Middle: activity | A timeline of every WhatsApp, call, email, SMS, note, stage change and meeting. Use the tabs to filter it and Export Log to download it. |
| Right: follow-up | Reminders & Follow-up and Meetings for this lead. |
Reaching out
- The row of channels at the top (WhatsApp, Call, Email, SMS, Notes) is how you contact the lead or log what happened.
- Quick Send (bottom of the activity panel): choose a channel, check the number or address, type your message and click Send Now. You can attach a file or add an emoji.
- Note saves an internal note on the lead without sending anything.
- Reminder and Meeting schedule a follow-up. They also appear in the Calendar.
People
The individuals you deal with: owners, purchase managers, decision makers. Each person can be linked to one or more companies and to leads.
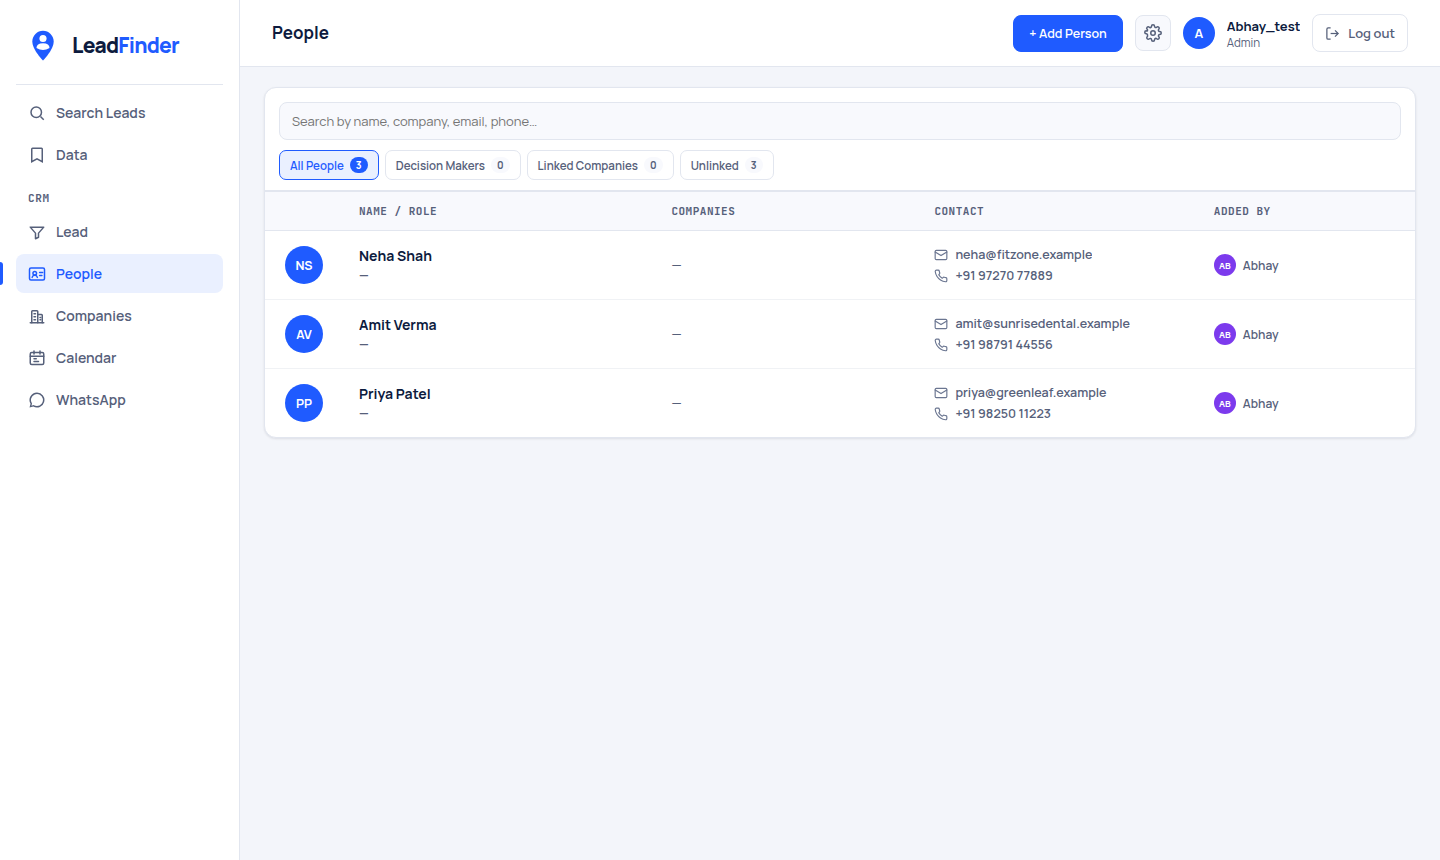
- Search by name, company, email or phone.
- Quick tabs: All People, Decision Makers, Linked Companies and Unlinked (people not yet attached to a company).
- Click a person to see their profile, linked companies and products they are interested in.
Adding a person
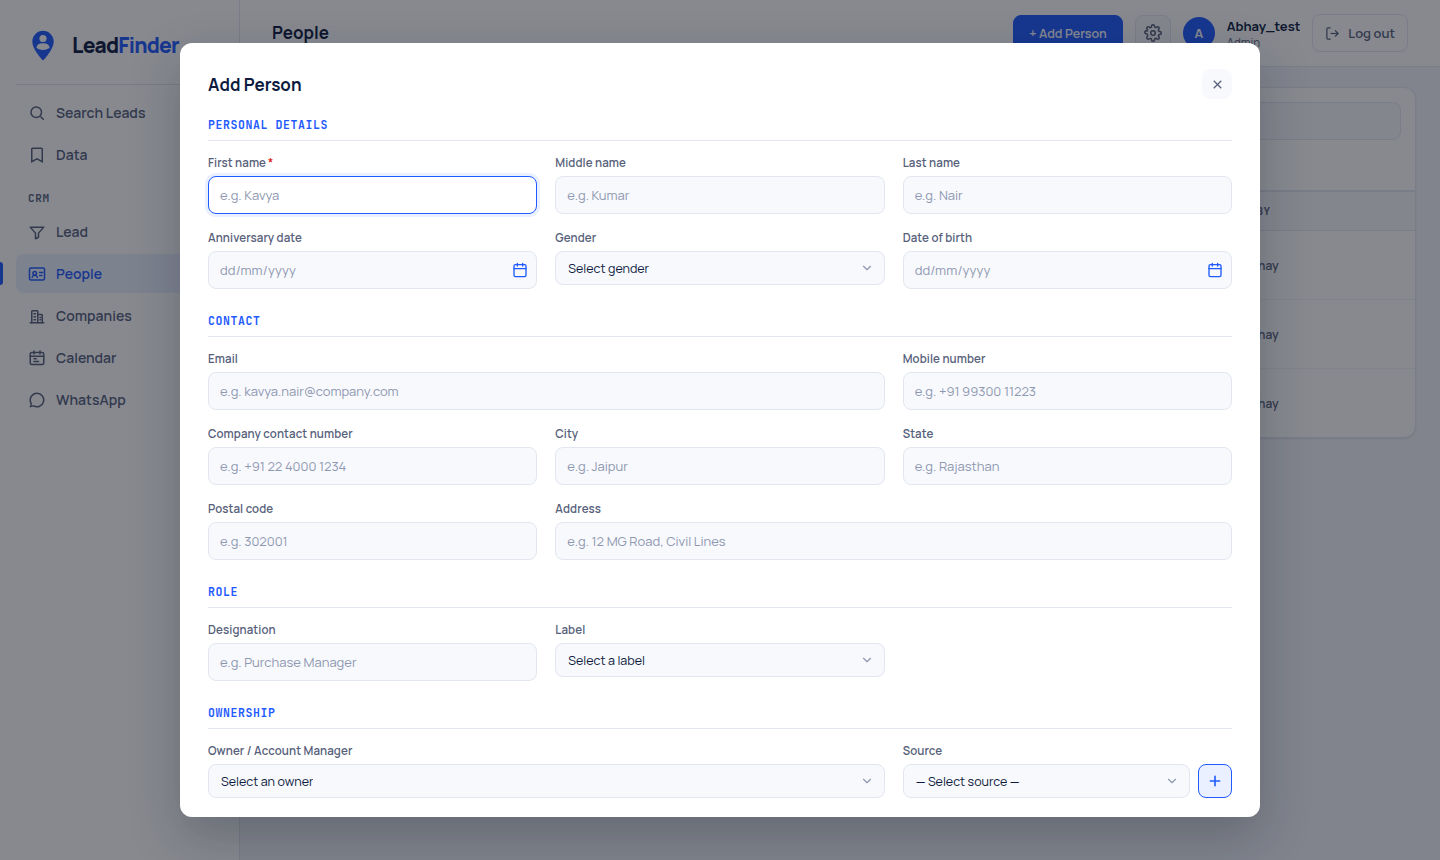
- Click + Add Person.
- Enter the First name (required). Middle and last name are optional.
- Add Email, Mobile number and address details.
- Set the Designation (their job title) and a Label such as Decision maker.
- Choose the Owner and Source, then save.
Companies
The businesses behind your leads. A company holds its details and the people who work there.
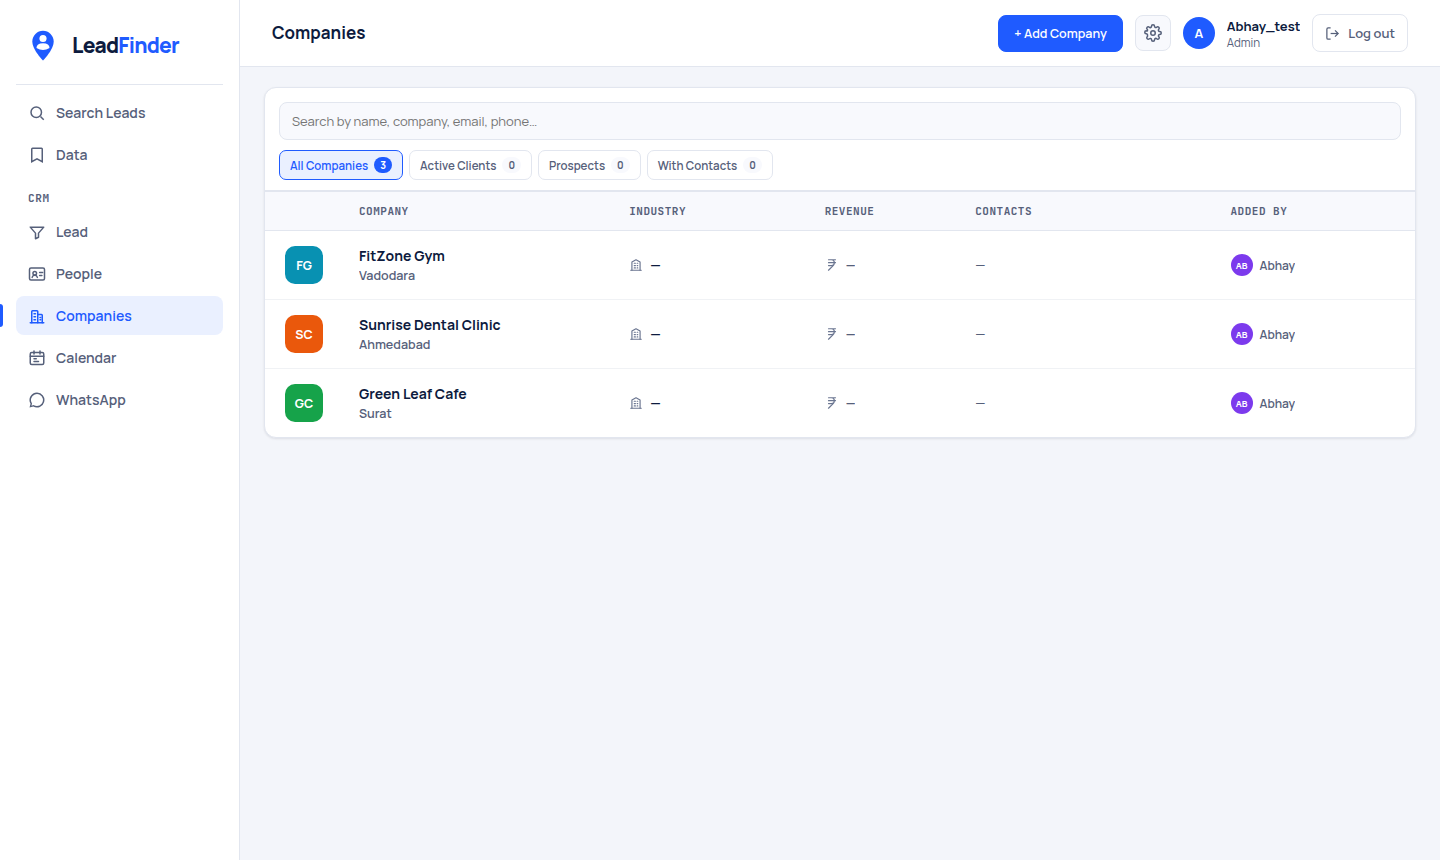
- Search by company name, email or phone, or use the tabs: All Companies, Active Clients, Prospects and With Contacts.
- The list shows each company's industry, revenue and contacts, and who added it.
- Click + Add Company to create one, then link the people who work there. A company can then be chosen on any lead.
Calendar
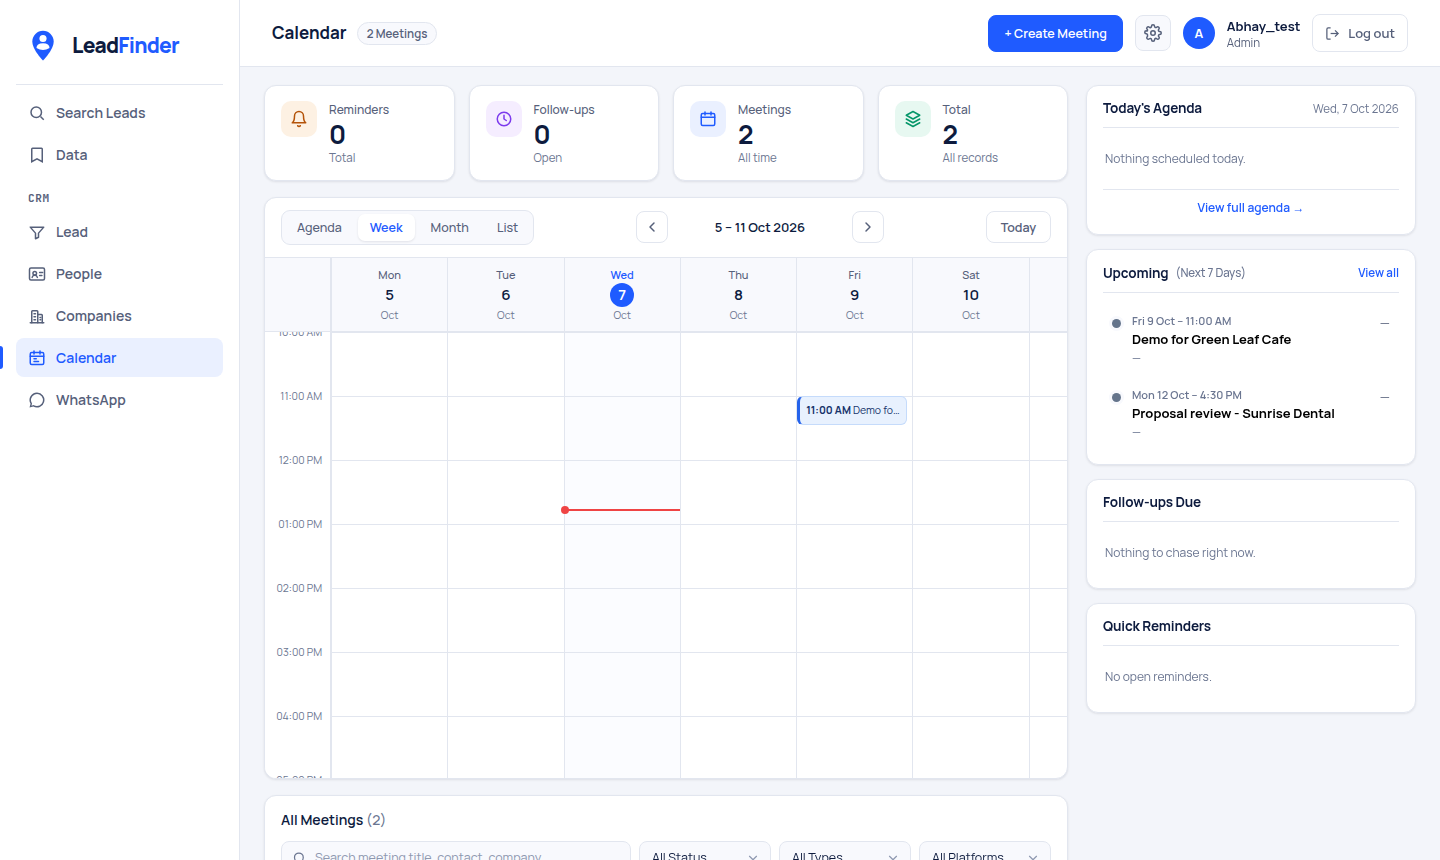
All your meetings, reminders and follow-ups on one calendar, so nothing is forgotten.
Reading the screen
- Top cards: counts of reminders, follow-ups, meetings and total records.
- View switch: Agenda, Week, Month or List. Use the arrows to move and Today to jump back.
- Right column: Today's Agenda, Upcoming (next 7 days), Follow-ups Due and Quick Reminders.
- All Meetings: a searchable list below the calendar, filterable by status, type and platform.
Creating a meeting
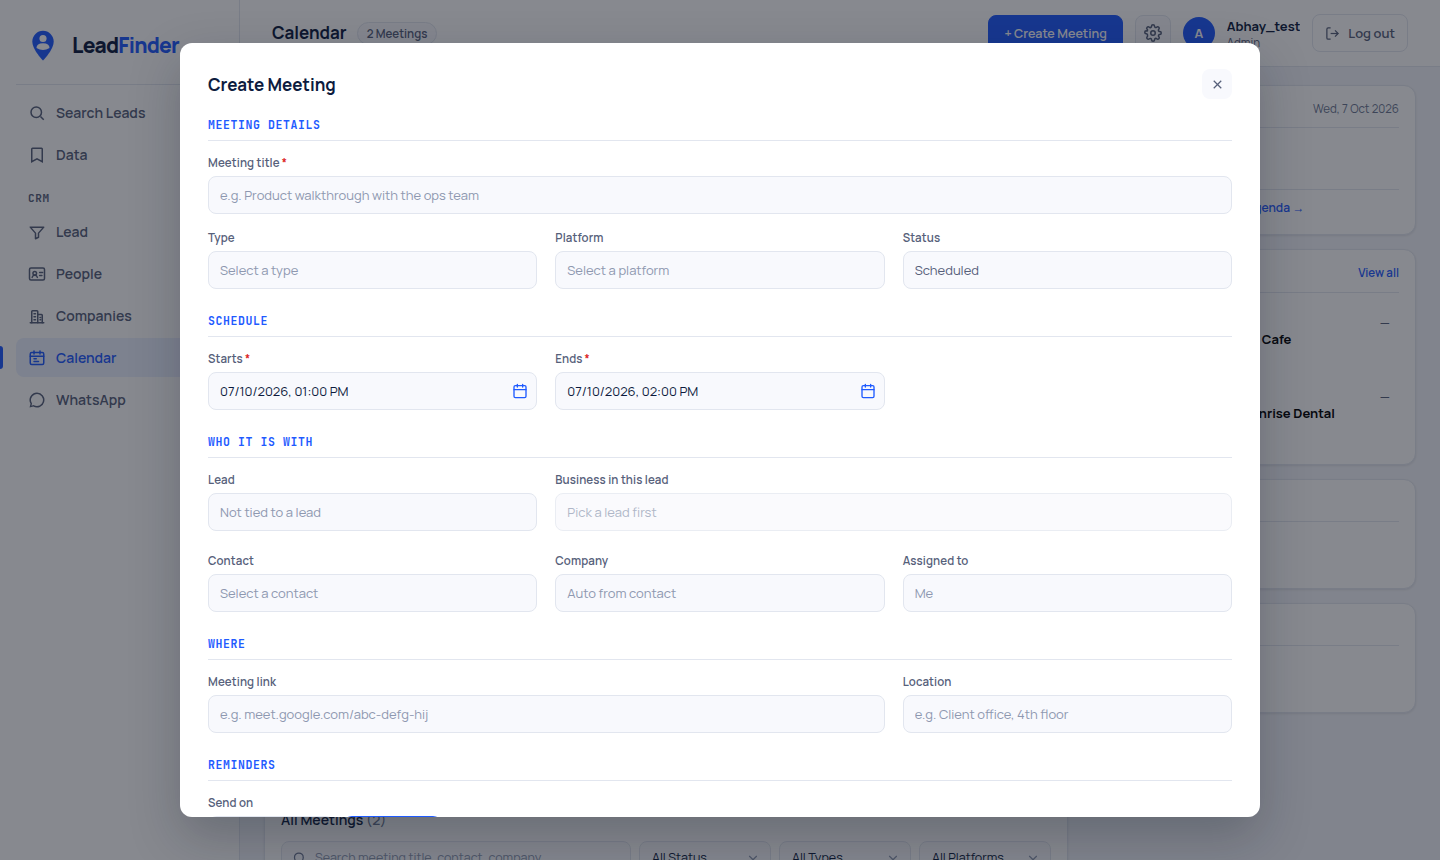
- Click + Create Meeting.
- Enter a Meeting title and the Starts and Ends time.
- Choose the Type and Platform (for example a video call), and add a Meeting link or Location.
- Under Who it is with, pick the Lead, Contact and who it is Assigned to.
- Set Reminders if you want one sent before the meeting, then save.
Chat with leads from inside Lead Finder, using your own WhatsApp number.
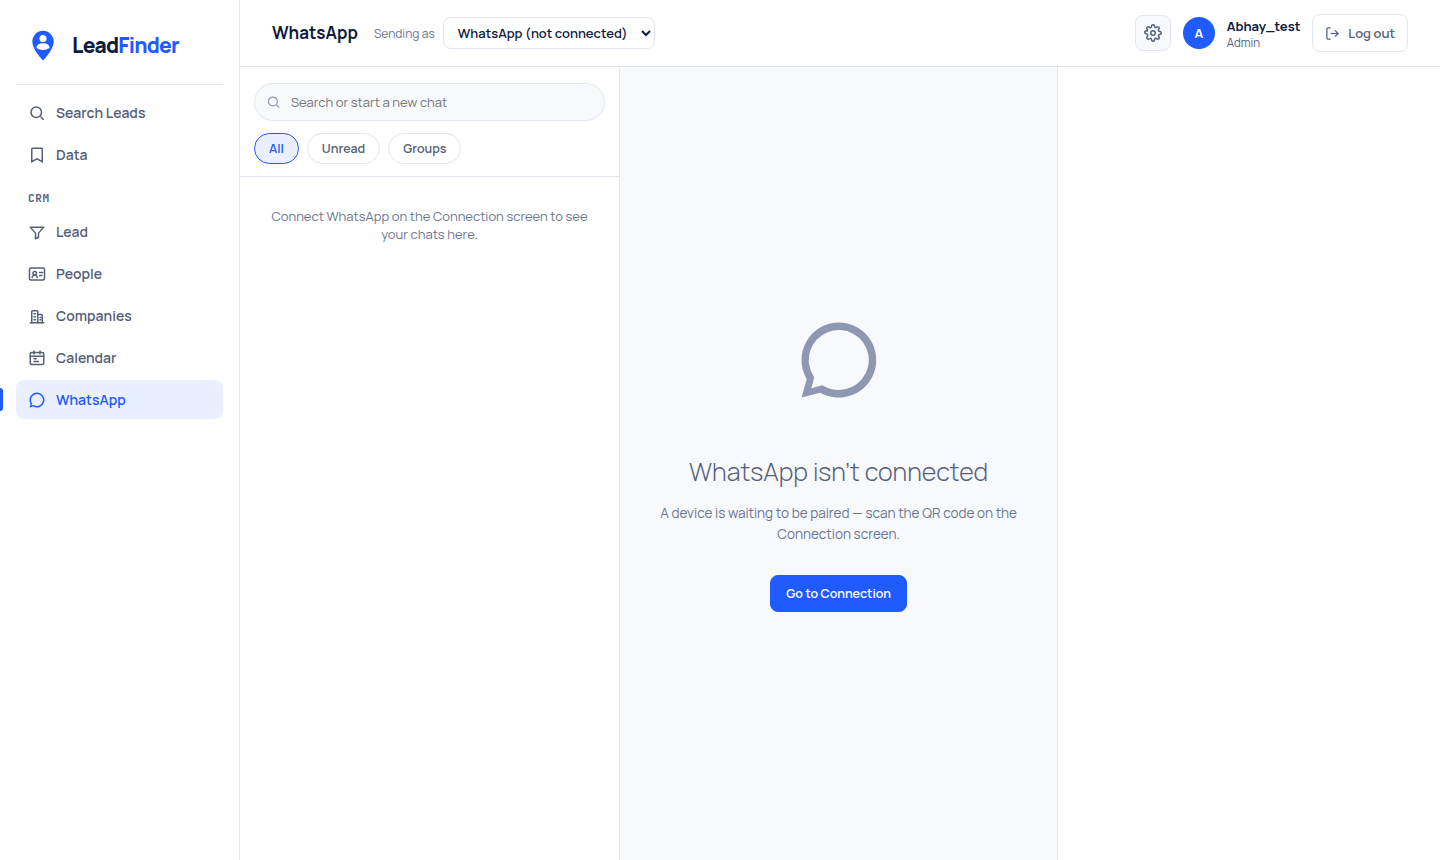
- Open Settings → Connection and scan the WhatsApp QR code with your phone (WhatsApp → Settings → Linked devices → Link a device).
- Come back to WhatsApp. Your chats appear on the left.
- Use Search or start a new chat to find a conversation, or filter by All, Unread and Groups.
- Pick the number to send from in the Sending as list at the top, if you have more than one.
Users
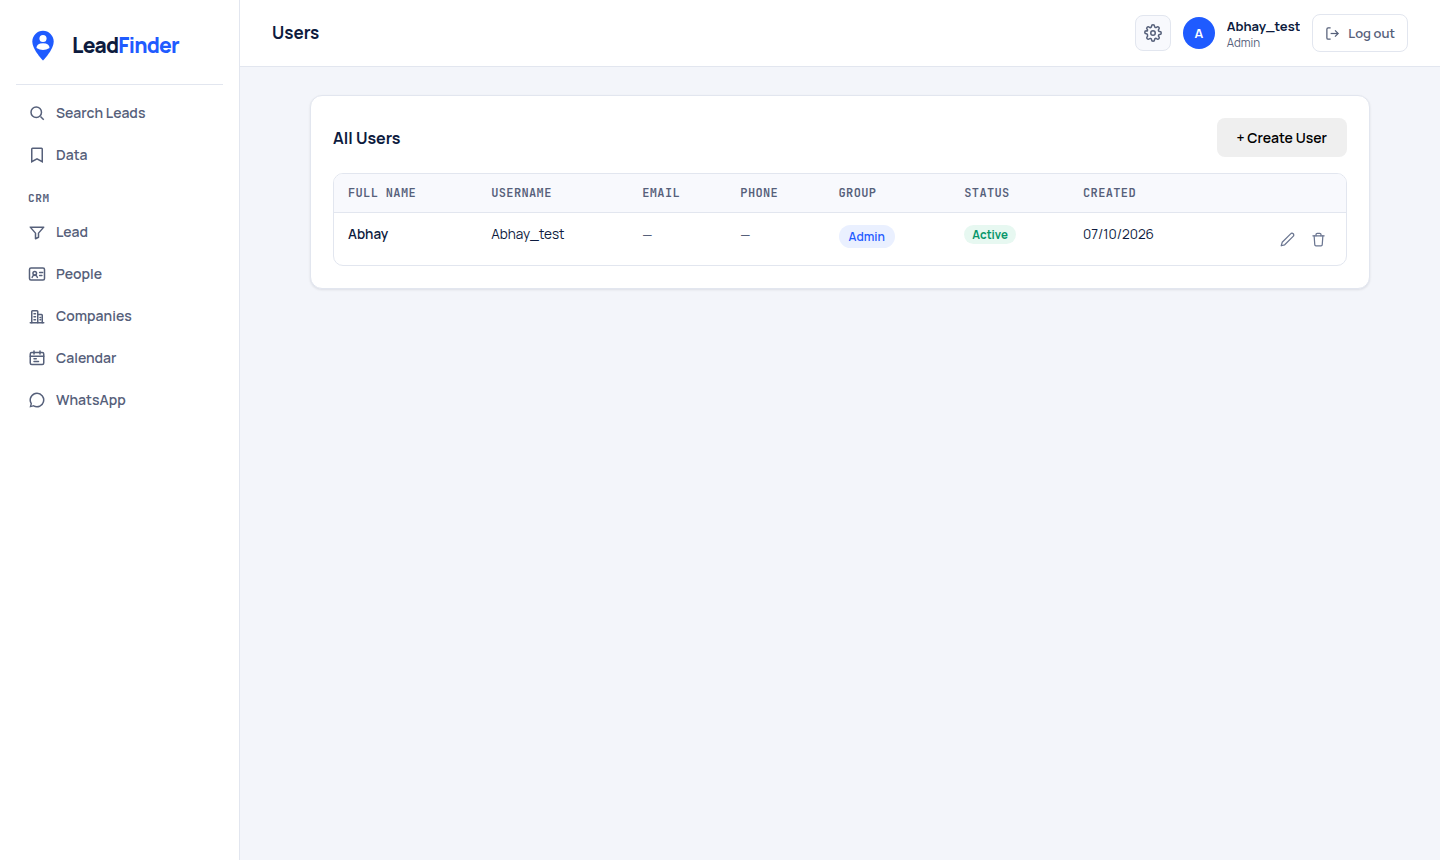
Everyone on your team who can log in. Open it from the gear icon → Users.
Adding a user
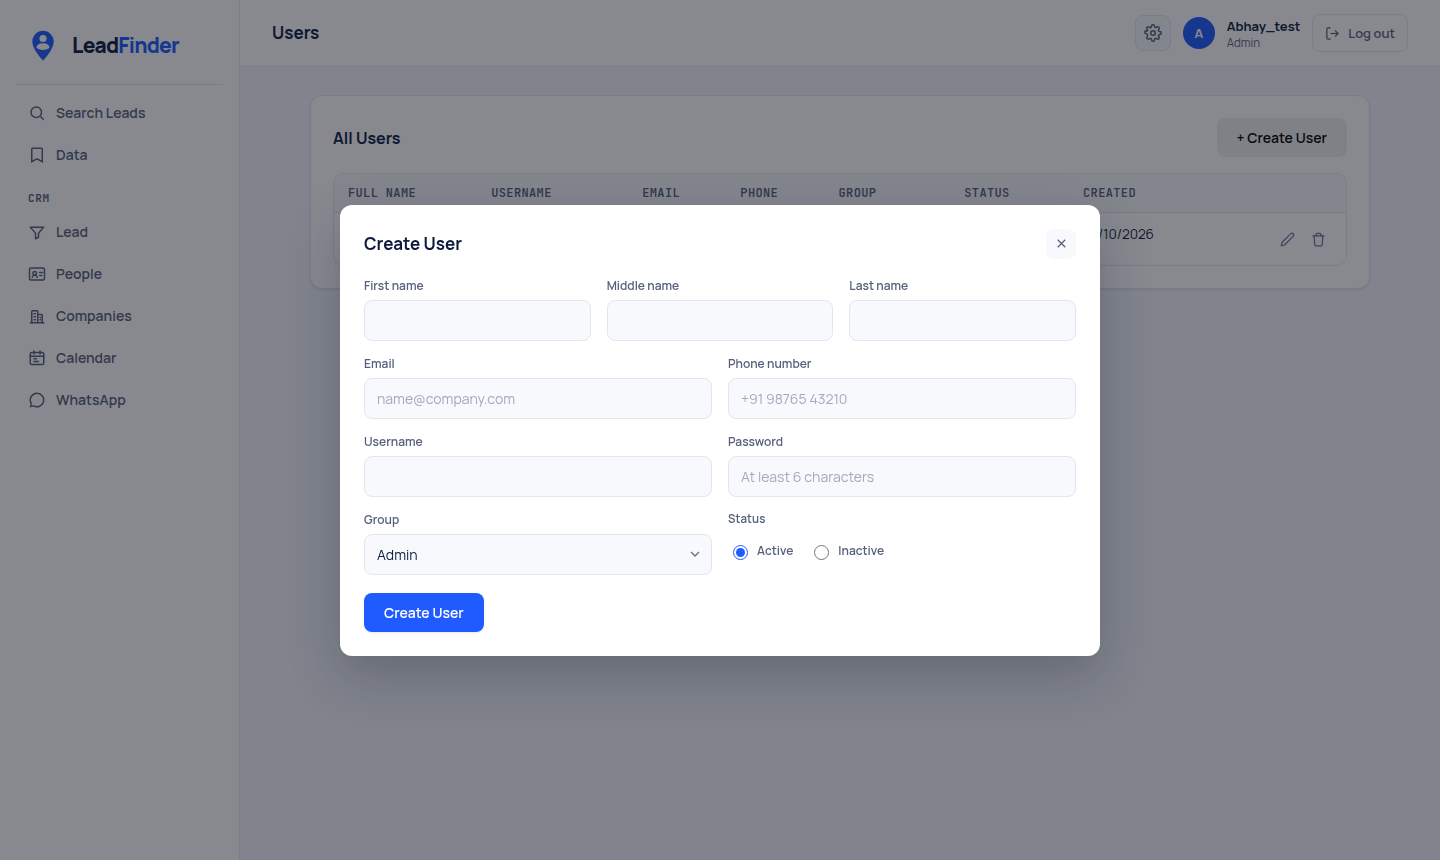
- Click + Create User.
- Enter the name, Email, Phone number, a Username and a Password (at least 6 characters).
- Choose the user's Group. The group decides what they can see and do.
- Leave Status on Active, or set Inactive to block log-in without deleting the person.
- Click Create User. Share the account name, username and password with them.
Use the pencil icon on a row to edit a user, or the bin icon to remove one (you are asked to confirm).
Groups
A group is a set of permissions. Put users in a group and they get exactly that access. Nothing more.
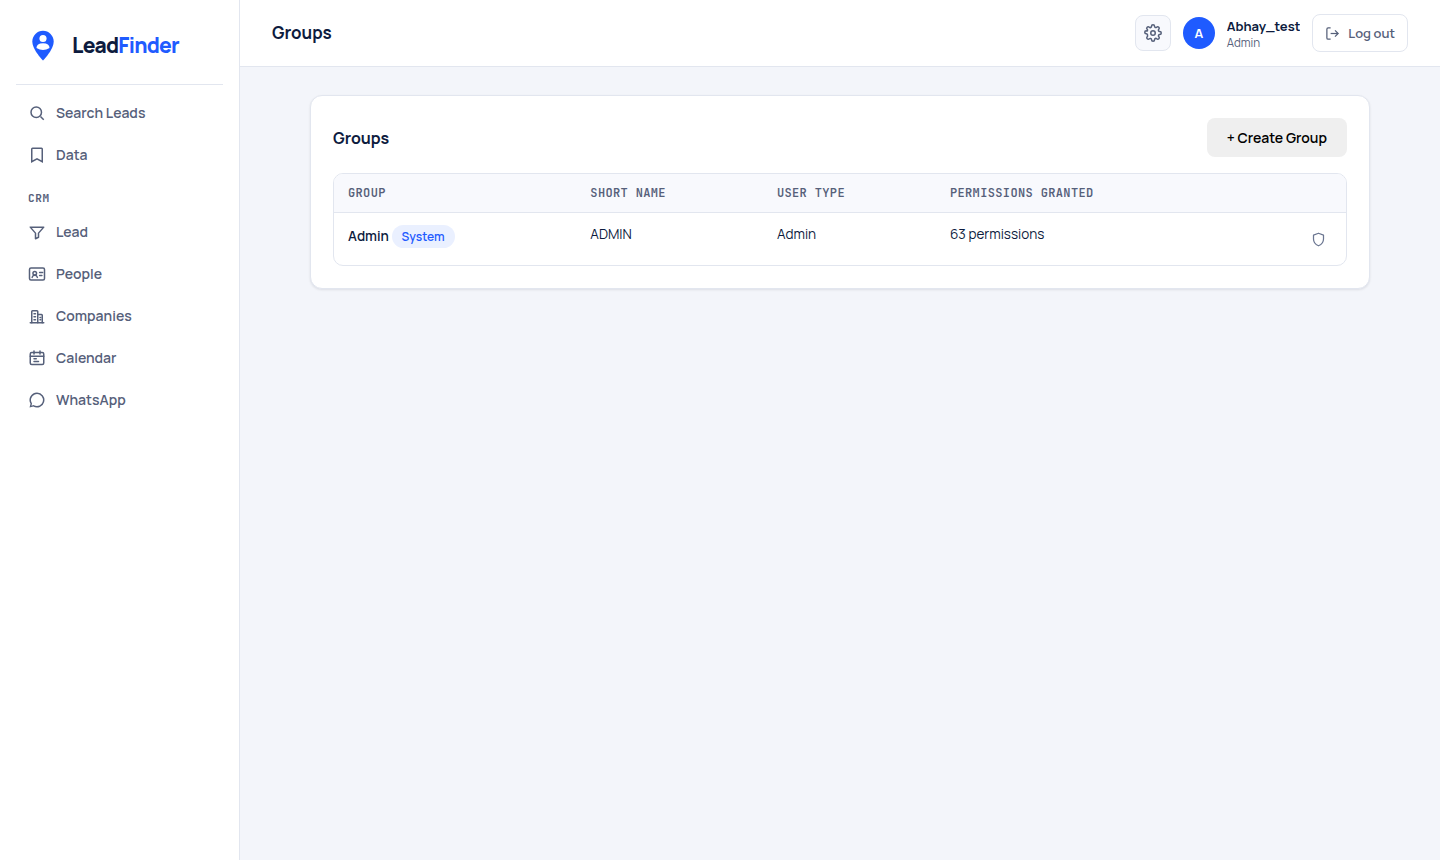
Creating a group
- Click + Create Group.
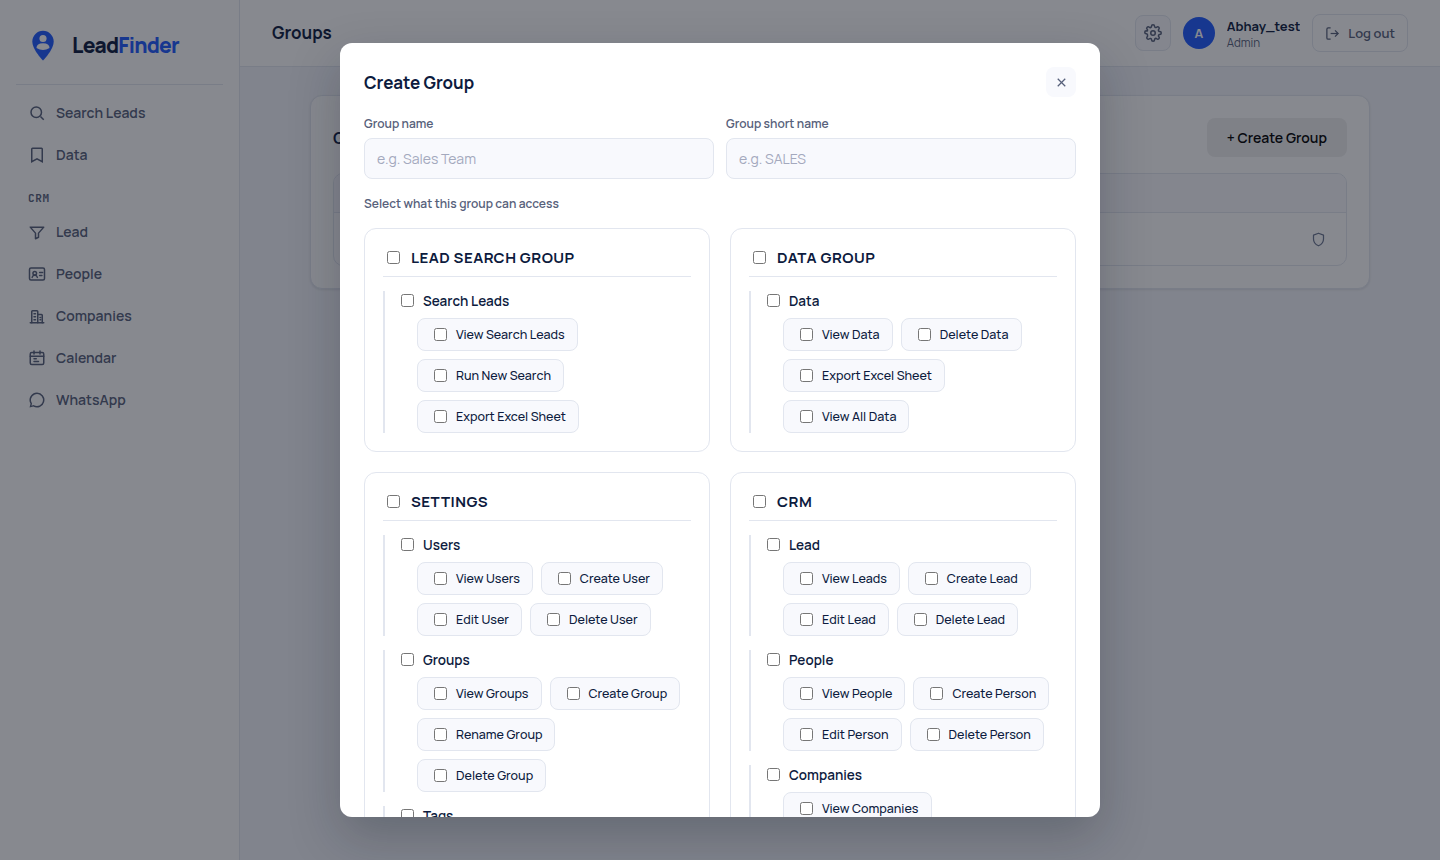
- Give it a Group name (for example Sales Team) and a short name.
- Tick what the group may do. Ticking a menu ticks everything under it, or choose individual actions such as View Leads, Create Lead, Edit Lead, Delete Lead.
- Save, then pick this group when you create users.
Connection
This is where you connect the outside services Lead Finder uses. Each one shows a status, and a switch to turn it on or off.
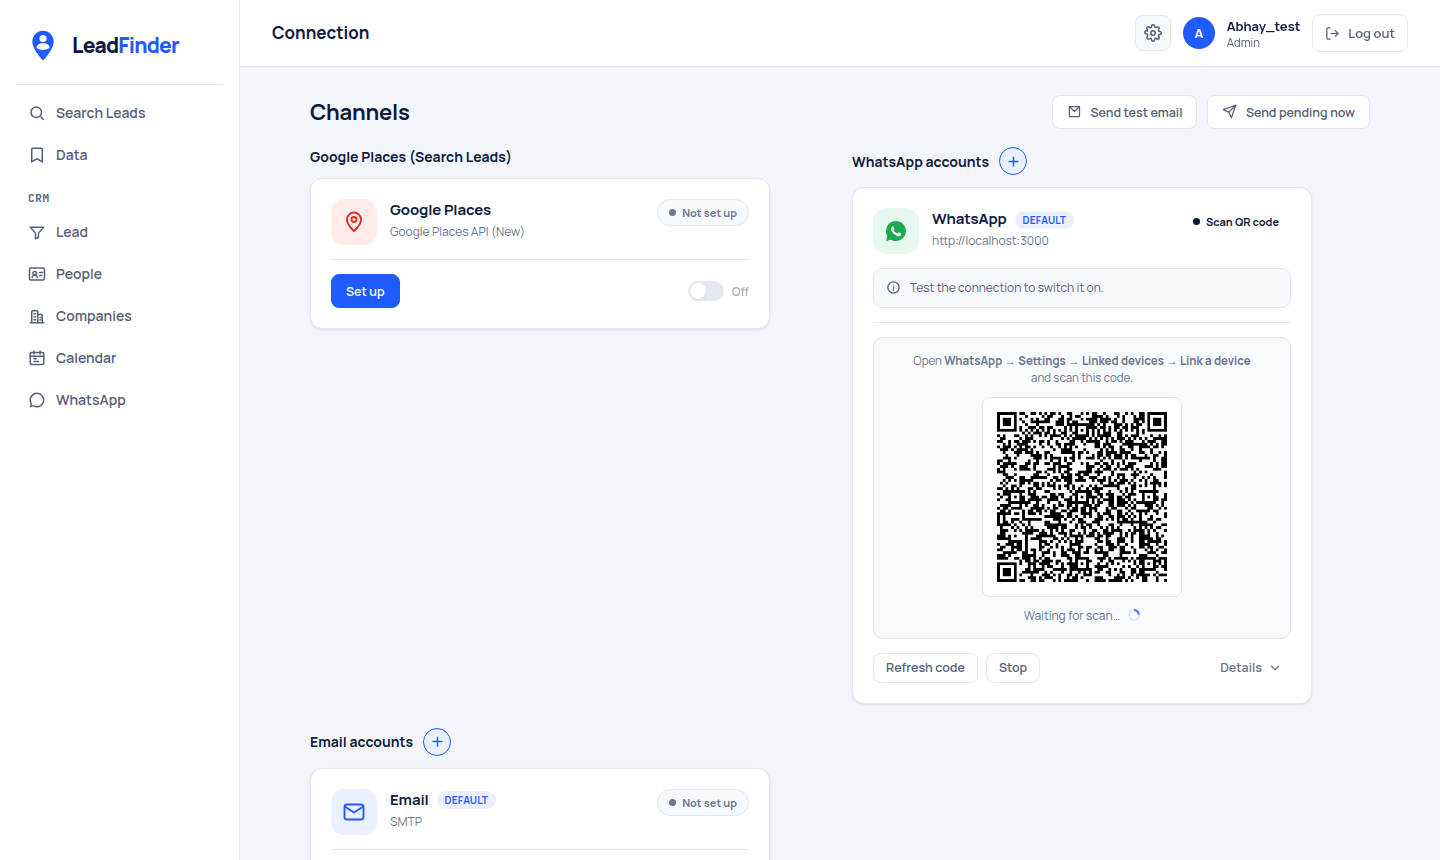
| Channel | What it is for | How to connect |
|---|---|---|
| Google Places | Powers Search Leads. | Click Set up, paste your Google Places API key (with Places API (New) enabled in the Google Cloud console), save, then switch it on. |
| Sending and receiving WhatsApp messages. | Scan the QR code shown on the card with your phone. The status changes once the device is linked. Use + to add more numbers. | |
| Sending emails and meeting reminders from your own mailbox. | Click Set up, enter your email address and SMTP password, then Save. See below. |
Connecting email
- Under Email accounts, click Set up (or Edit).
- Enter your Email address and SMTP password. For Gmail and Outlook this is an app password, not your normal password.
- Click Save. Lead Finder tests the login straight away and tells you if it was refused.
- When it shows Verified, switch the toggle On.
- Click Send test email at the top to check that a message really arrives.
emailapikey) while mail is sent from your own address. Open Advanced options in the email form and enter that name under SMTP login username, plus the provider's SMTP host and port.Tags, Category, Lead Stage and other lists
These are the dropdown lists used across the app. Keeping them tidy keeps your data consistent, so everyone picks from the same choices. All of them work the same way: add a new entry, use the pencil to rename and the bin to remove.
| List | What it is |
|---|---|
| Tags | Coloured labels you attach to leads, people and companies (for example VIP or Follow up) so you can group and find them quickly. |
| Category | The type of business or industry (for example Cafe, Dental clinic). Used when you add data by hand. |
| Lead Stage | The steps of your sales process. Each stage has a funnel group and an outcome: Won, Lost or In Progress. |
| Products | What you sell. Link products to people to record what they are interested in. |
| Contact Labels | Roles for a person at a company, such as Decision Maker, Billing Contact or Influencer. |
| Sources | Where a lead or contact came from: Google, Referral, Cold Call, Advertisement and so on. |
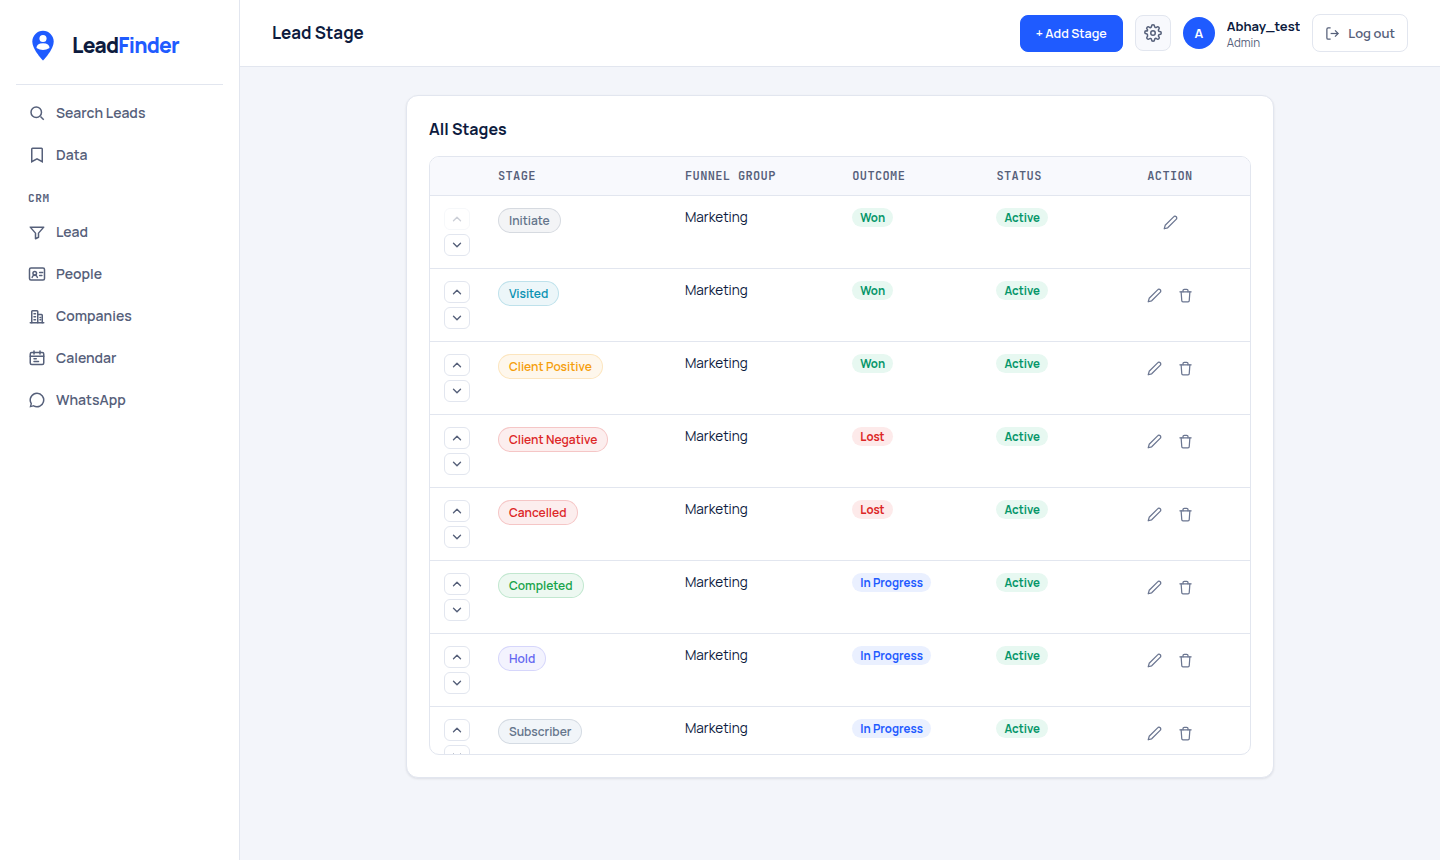
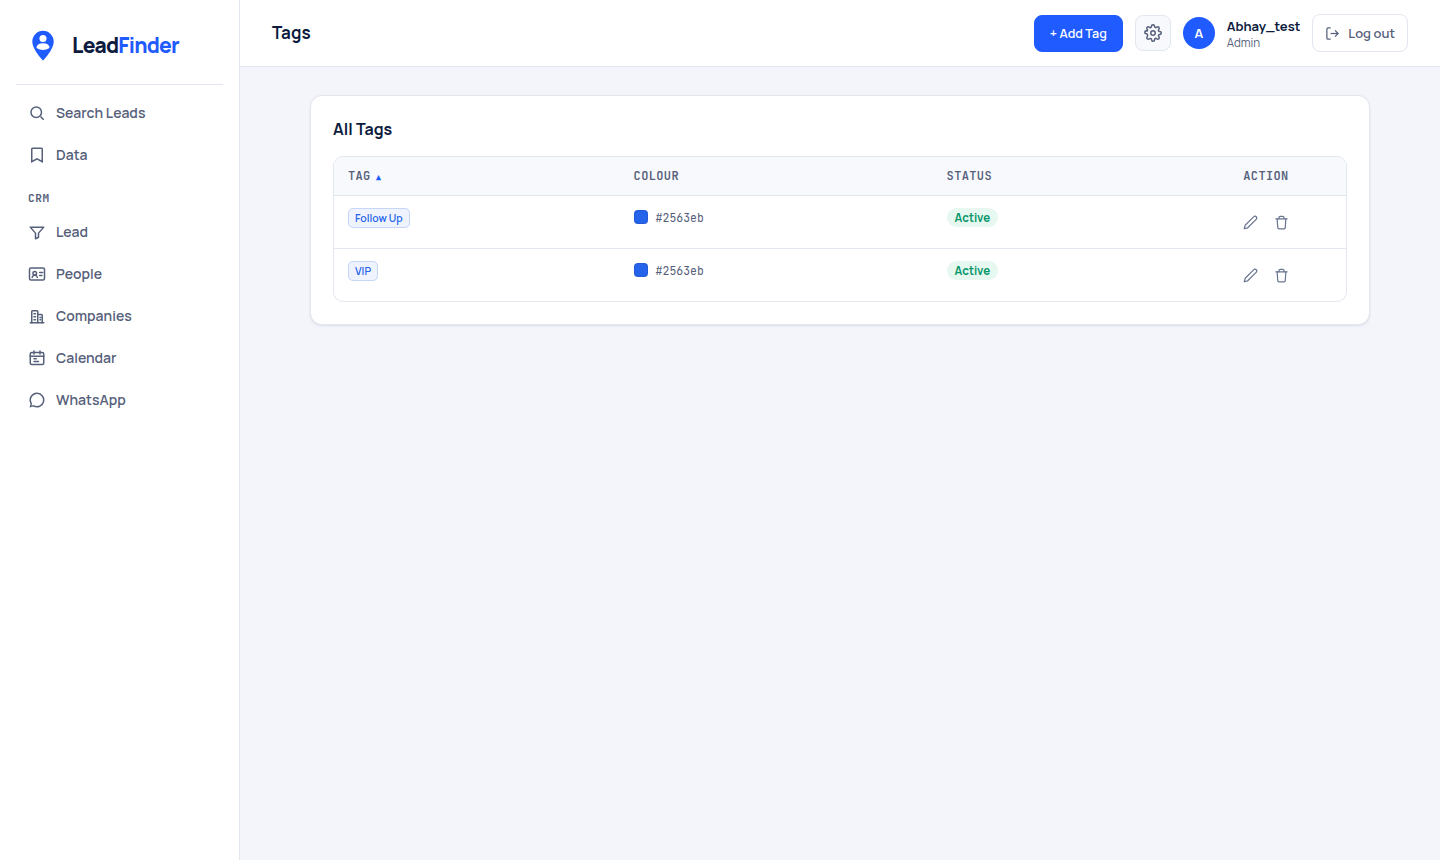
Adding an entry
- Open the list from the gear icon (for example Tags).
- Click the + Add button at the top right, type the name and save.
Common questions
I can't log in.
A menu is missing from my left side.
Search Leads shows an error or finds nothing.
My emails or WhatsApp messages aren't sending.
Will I get duplicate businesses?
Someone left the team. What should I do?
Where can I get more help?
Developed by Aarvi Technology · Back to log in